
Most garages don't have a storage problem. They have a landing problem. Tools come out of the box, land on the bench, and the bench quietly becomes the storage. A garage tool storage setup only starts working the day the trip back to the wall is shorter than the toss onto the bench.
I'm Ray. I've been a diesel mechanic for 16 years and I run a home shop in Columbus, Ohio. My shop started as one toolbox. It's three now, plus a wall that looks like a hardware store aisle. I've organized storage for myself, for the guys on my shift, and for every friend who bought a starter set and called me two years later when it had overflowed onto the floor.
Here's the honest version: you probably don't need more boxes. You need two zones. A wall zone for the tools that live in your hands all day, and a mobile zone for the heavy stuff that needs drawers and a rolling surface. Get those two right and everything after that is details.
Why you should trust me
Drawer slides are the soul of a toolbox. Ball bearings, or you're buying a metal box with a label on it. That's the first thing I check on any chest, and it's the thing I'll argue about at a parts counter.
In 16 years I've watched a lot of storage fail in slow motion. Friction slides that need two hands by year two. Casters that lock on one wheel and skate on the other three. Drawers that sag when they're full of sockets, because the weight rating was measured with the load spread perfectly flat and a drawer full of 3/8 drive sockets is not spread flat.
I keep a caliper in my pocket and an opinion about gauge steel. What I actually care about is whether a setup survives a working shop: daily drawer slams, an 80 pound socket set, and the only test that matters long term, which is whether tools go back where they belong at the end of a shift.
How I picked and what I look for
Two products carry this guide, and they cover the two zones. One is a wall rack for cordless tools and batteries, and one is a mobile workbench with drawers. I picked them by running the same checklist I'd run on any storage in my own shop, and I want you to run it too, because it's the difference between a setup that lasts a decade and one you're cursing in year two.
Here's the checklist.
Anchoring reality. A wall rack is only as strong as what it's bolted to. Sheet metal ratings assume the fasteners are going into studs, blocking, or concrete. If the number on the box sounds impressive and you're planning to hang it on drywall anchors, the number is fiction.
Load rating versus real load. Manufacturers rate capacity with weight spread evenly across the structure. You and I load a shelf the way a shop loads it: 40 pounds of batteries on one end, nothing on the other. Assume you'll get about two thirds of the advertised number in real use and plan around that.
Slide quality. Ball bearing or soft close, and nothing else. Friction slides on a box that costs real money are a warning sign about everything else inside it.
Caster behavior. On anything mobile, I want casters that roll over a floor seam and lock hard. Locking on one wheel and free spinning on the rest is a design flaw you'll feel every single day.
Reach height. The tool you use most should be at chest height, not overhead and not at your knees. This one detail decides whether you actually use the system or work around it.
Power at the point of use. Cordless tools need chargers where the tools live. If the charger is on the other side of the garage, the batteries end up on the bench. Every time.
The two zones every garage needs
The wall zone is vertical storage for the tools that cycle constantly: drills, drivers, batteries, chargers, the stuff you grab ten times a day. It should sit near the bench, within arm's reach of where you work.
The mobile zone is the drawer storage and the work surface. It holds the heavy, low frequency, and high value stuff: sockets, wrenches, torque tools, and the bench grinder that's too heavy to lift onto a shelf.
Build the wall zone first. It's the cheaper half of the build and it clears the clutter that makes the mobile zone necessary in the first place.
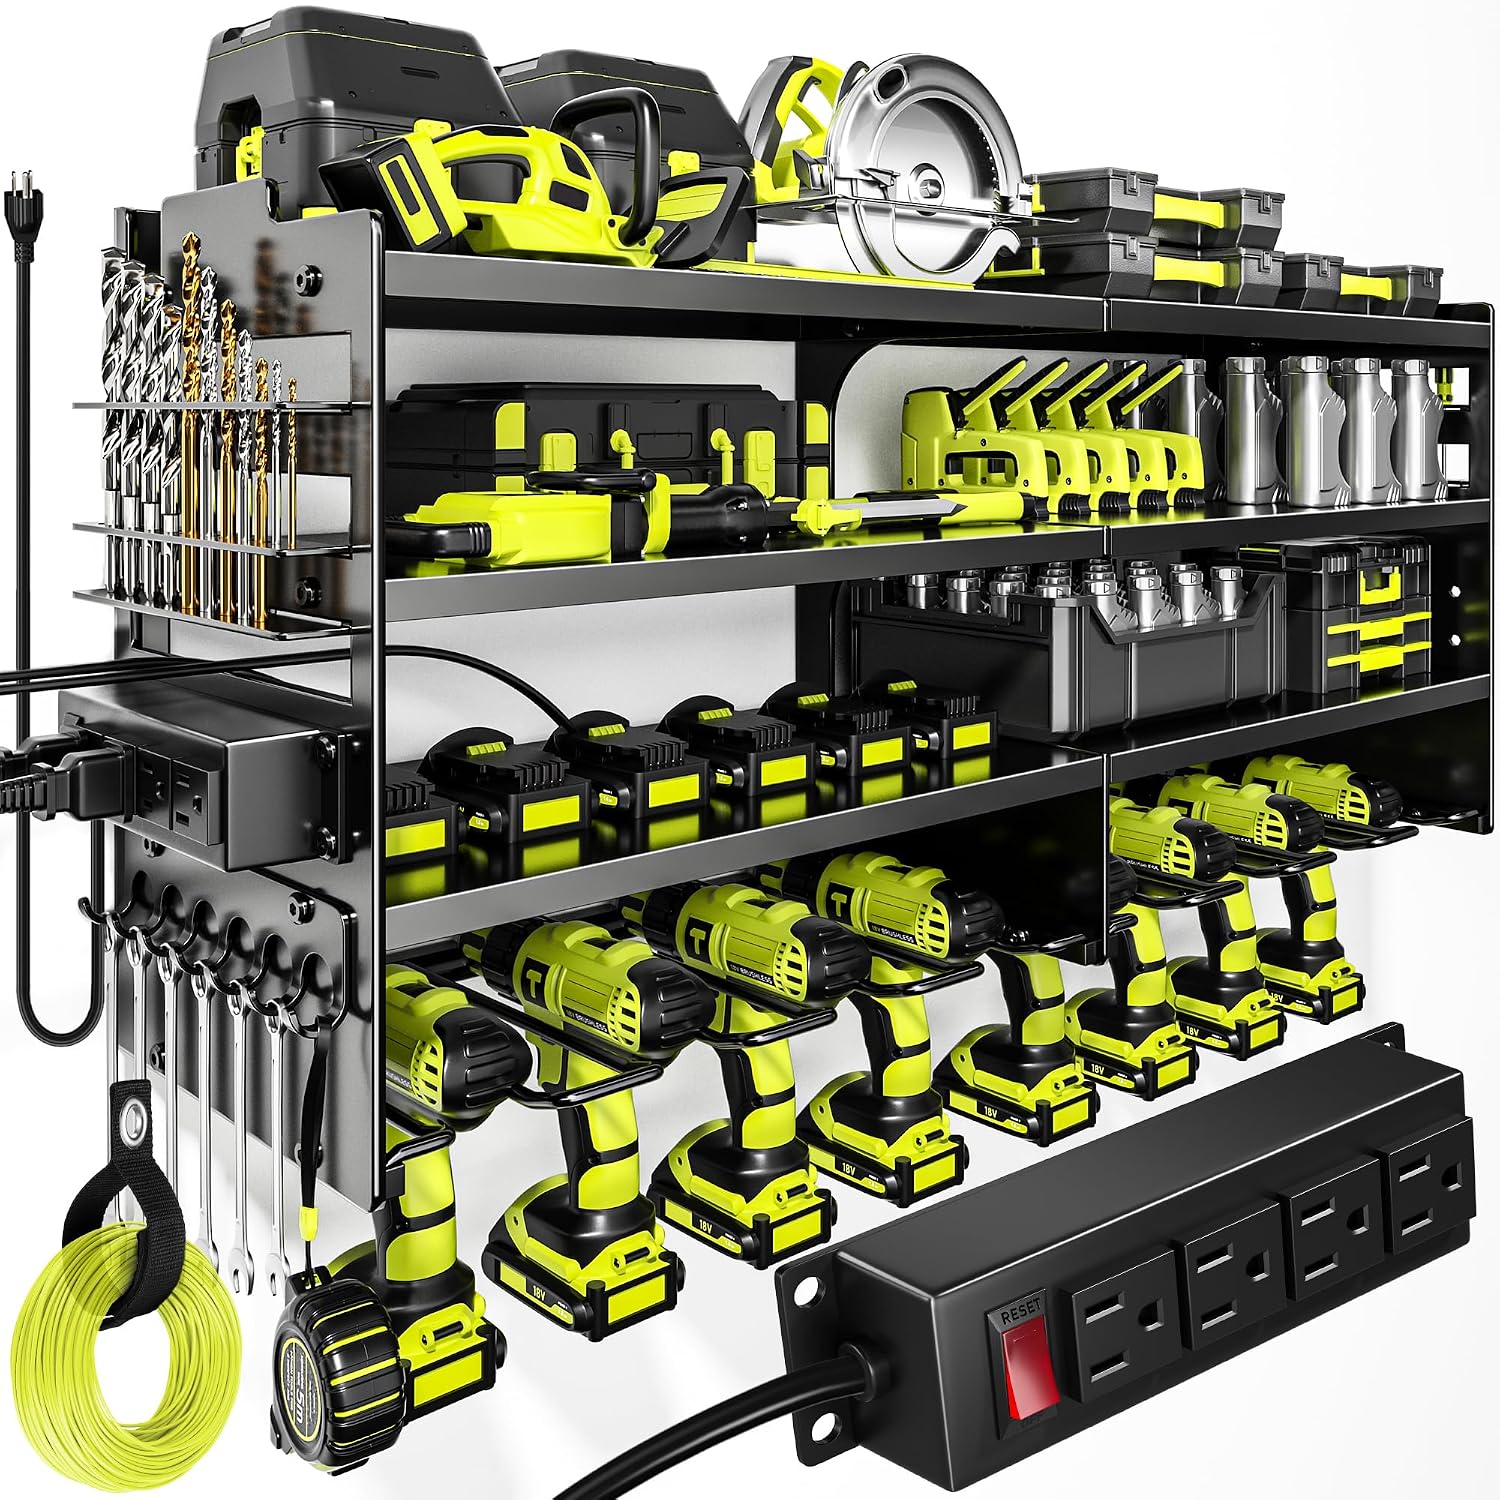
Wall zone pick: POKIPO Large Power Tool Organizer Wall Mount with Charging Station, 4 Layer Heavy Duty Metal Tool Storage Rack Loads 600lbs with 8 Cordless Drill Holder, Battery Utility Rack Loads with 4 Power Strip
 Visit on Amazon →
This is the piece that fixes the landing problem. Four layers of steel shelving, eight drill holders, and a built in power strip so the chargers live on the rack instead of on your bench. The listing rates it at 600 pounds of load, and that number is only meaningful if you mount it into studs, blocking, or concrete. Do that and you have a wall zone that holds every cordless tool you own plus the batteries.
The power strip is the feature I'd pay for on its own. Charging at the point of use is the whole reason cordless tools end up scattered, and a rack that brings the outlets to the tools solves it in one move.
Flaws but not dealbreakers: Steel racks in this class are only as good as the fasteners and the wall behind them. Budget for lag bolts into framing, and if your garage wall is finished drywall with no blocking, plan to open it up and add a backer. Also check the spacing between the drill holders against your actual tools before you commit, because oversized impacts and stubby right angle drills don't always fit a universal cradle.
Anyone with five or more cordless tools and a garage wall that can take a lag bolt will get the most out of this.
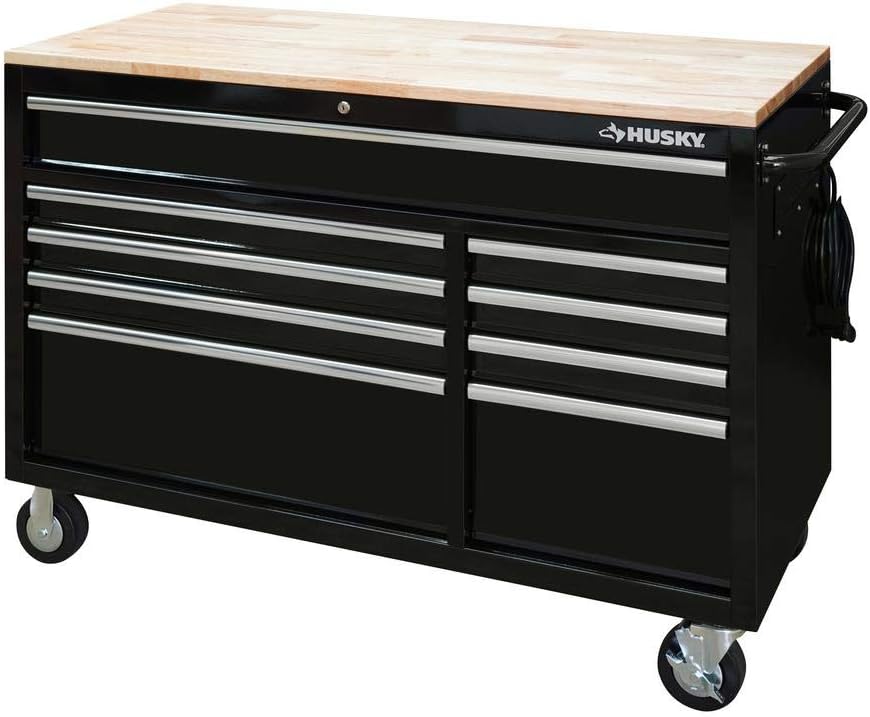
Mobile zone pick: HuskyTools Husky 52 in. x 24.5 in. D 9-Drawer Mobile Workbench in Black
 Visit on Amazon →
This is the mobile zone. Fifty two inches wide, 24.5 inches deep, nine drawers, and it rolls, which matters more than people admit until the day they rearrange the shop or move houses. A workbench with drawers under it does two jobs at once, and the depth gives you a real surface instead of a shelf pretending to be a bench.
Husky has earned its reputation for value in this size class. The 52 inch footprint is the sweet spot for a two car garage: wide enough for a vise on one end and a work area on the other, narrow enough to leave room for the wall zone above it.
Flaws but not dealbreakers: The 24.5 inch depth is the number to check against your space. It needs clearance in front for drawers to open fully, and it needs a floor that lets the casters roll without fighting a slope or a seam. Before you buy any chest in this class, confirm the slide type in the listing details. Ball bearing slides are the standard you want, and if a box at this size ships with friction slides, walk away.
Anyone who wants drawer storage and a work surface in one footprint, and who may need to move it later, should look here first.
The setup, step by step
Now the part that decides whether this works.
Step one: Audit before you buy anything. Pull every tool out and sort into three piles. Daily use, weekly use, and the stuff you keep because you own it. Daily use goes in the wall zone at chest height. Weekly use goes in the top drawers of the mobile zone. The third pile is the one that fills your garage, and it goes in the highest, hardest to reach drawer or a box on a top shelf.
Step two: Find your studs and mark the wall. Use a stud finder and confirm with a thin nail or an awl. Mark the center of every stud across the span you're covering. This step takes ten minutes and it's the difference between a rack that holds and a rack that pulls out of the wall with a drill still in the cradle.
Step three: Set the height before you drill. The lowest shelf should land around 48 to 54 inches off the floor, which puts the most used drill at chest height. Too high and you'll stop using it. Too low and you'll be bending for a tool you grab fifty times a day.
Step four: Mount the wall rack into framing. Two people make this easy. One holds, one drives. Lag bolts or heavy structural screws into studs, washers under the heads, and check for level before you tighten the last one. If your layout forces you between studs, add a plywood backer spanning at least three studs and mount to that.
Step five: Bring power to the zone. The rack's built in strip handles the chargers. Plug it into a GFCI protected outlet, and don't daisy chain extension cords across the garage floor to get there. If the outlet isn't close, that's an electrician job, and it's worth doing once.
Step six: Place the mobile workbench. Park it so drawers open fully without hitting anything, and so you can walk the full length of it with the drawers closed. Keep it near the wall zone so the workflow is one step, not five. Lock the casters, then check that all four actually lock. If only one wheel locks on your floor, adjust or return it.
Step seven: Lay out drawers by weight, not by brand. Heaviest tools go in the bottom drawers. Sockets and wrenches, the dense stuff, ride low where they don't make the box top heavy and don't fight the slides. Light, long, and awkward items go up top. If a drawer sags when you open it fully loaded, you put too much in it or the slides aren't what the box promised.
Step eight: Label everything and enforce the return rule. Tape and a marker, nothing fancy. The rule that makes the whole setup work is simple: a tool comes out, the drawer closes, and the tool goes back before you reach for the next one. A system that makes putting tools away easier than leaving them out is the only system that survives a busy month.
Mistakes that kill a tool storage setup
The first mistake is buying the box before you plan the wall. People spend the budget on a chest and then have nowhere to put the cordless tools, so the bench fills up anyway.
The second is trusting a weight rating without reading how it was measured. Even load spread across a shelf is not how a shop loads a shelf.
The third is mounting heavy steel into drywall anchors. It works right up until the moment it doesn't, and when it fails it fails with your tools.
The fourth is storing batteries somewhere hot. A garage that bakes in July will cook lithium packs sitting on a south facing wall. Keep batteries in the shaded part of the zone.
The fifth is leaving the charger on the bench. If the charger isn't on the rack, the drills won't be either.
The competition and why it lost
Modular stackable systems like Packout and ToughSystem are genuinely good, and if you work out of a truck or a job site, they're the right answer. In a fixed garage they're a compromise, because you're paying for portability you don't use and stacking boxes to reach the one at the bottom. That's a guide of its own.
Resin cabinets are fine for light garage storage. They are not tool storage, no matter what the box says. And traditional budget chests with friction slides are the category I'd skip entirely, because the second year with them is the year you start pulling drawers with both hands.
This guide is about the two zone setup: wall rack plus mobile workbench.
What this all costs
Check current Amazon price on the wall rack, and check current Amazon price on the mobile workbench. Those are the only two numbers that matter here, and they move.
Think about it as a ratio instead. The wall rack is the smaller line item, and it's the one that fixes the daily mess. The mobile workbench is the bigger purchase, and it's the one that holds the tools worth more than the box itself. A setup that organizes thousands of dollars of tools for a fraction of that total is the best value in the shop, and it's not close.
The build order is what keeps the cost sane. Wall zone first, live with it for a month, then add the mobile zone when you know what you actually need to store.
That's the job. Two zones, real fasteners, and a return rule you actually follow. Everything else is just steel.