Most garages have the same problem, and it is not a shortage of tools. It is that the tools you reach for every day have nowhere to live. Drills end up on the bench, batteries end up on a shelf, chargers end up on the floor in a puddle of extension cord. A wall mount power tool organizer fixes all of that in one afternoon, but only if you bolt it to studs and load it in the right order. Get those two things wrong and you will hear the whole thing come off the wall at 6 a.m. on a Tuesday.
I'm Ray. I've been a diesel mechanic for 16 years, and I run a home shop in Columbus, Ohio that started as one toolbox and turned into three. I have hung racks, shelves, and cabinets on garage walls for myself, for coworkers, and for every friend who ever bought a starter set and then asked me why their drill was always in the way. This is the process I use, and the two organizers I would put my own tools on.
Why you should trust me
Sixteen years in a shop teaches you what a wall can and cannot carry. I have watched a loaded shelf pull four drywall anchors out of a wall like buttons off a shirt. I have also watched a rack bolted into two studs hold a pile of cordless tools for a decade without a wobble. The difference was never the rack. It was the fasteners and the studs behind them.
My whole approach to tool storage comes down to one rule: putting a tool away has to be easier than leaving it out. If a rack makes you lift a drill over your head or fight a hook to get a battery seated, you will stop using it by week three. I keep a caliper in my pocket and strong opinions about steel thickness, and I judge every wall rack by how it behaves on day 400, not day one.
What makes a wall organizer worth hanging
Before you buy anything, know what separates a rack that lasts from a rack that sags. Four things matter.
Gauge and welds. Thin sheet metal flexes under a drill and stays bent. Run your hand along the shelf edges and the welds at the corners. A rack that rings hollow and twists in your hands is going to bow the first time you drop a hammer drill on it.
How the tools actually sit. Deep cradles hold a drill body without letting it slide sideways. Shallow hooks let tools walk. For batteries, you want a shelf with a lip, not a flat plate where a 5.0Ah pack can roll off the front.
Spacing and reach. Measure your tallest tool before you decide on mount height. A 4-tier rack with the bottom tier at bench height means your longest drill hangs into your work surface. The lowest tier should clear the bench by at least 18 inches so a drill chuck and bit hang free.
The attachment. This is the one people skip. A manufacturer's load number, whether it is 200 pounds or 600 pounds, assumes a solid mounting surface. The rack does not carry that load. Your studs do. Everything in this guide comes back to that.
Two organizers worth the wall space
Both of the racks below are steel wall units with multiple tiers and drill holders, and both land in the same price neighborhood as a mid-grade hand tool, not a chest. Here is how I would choose between them.
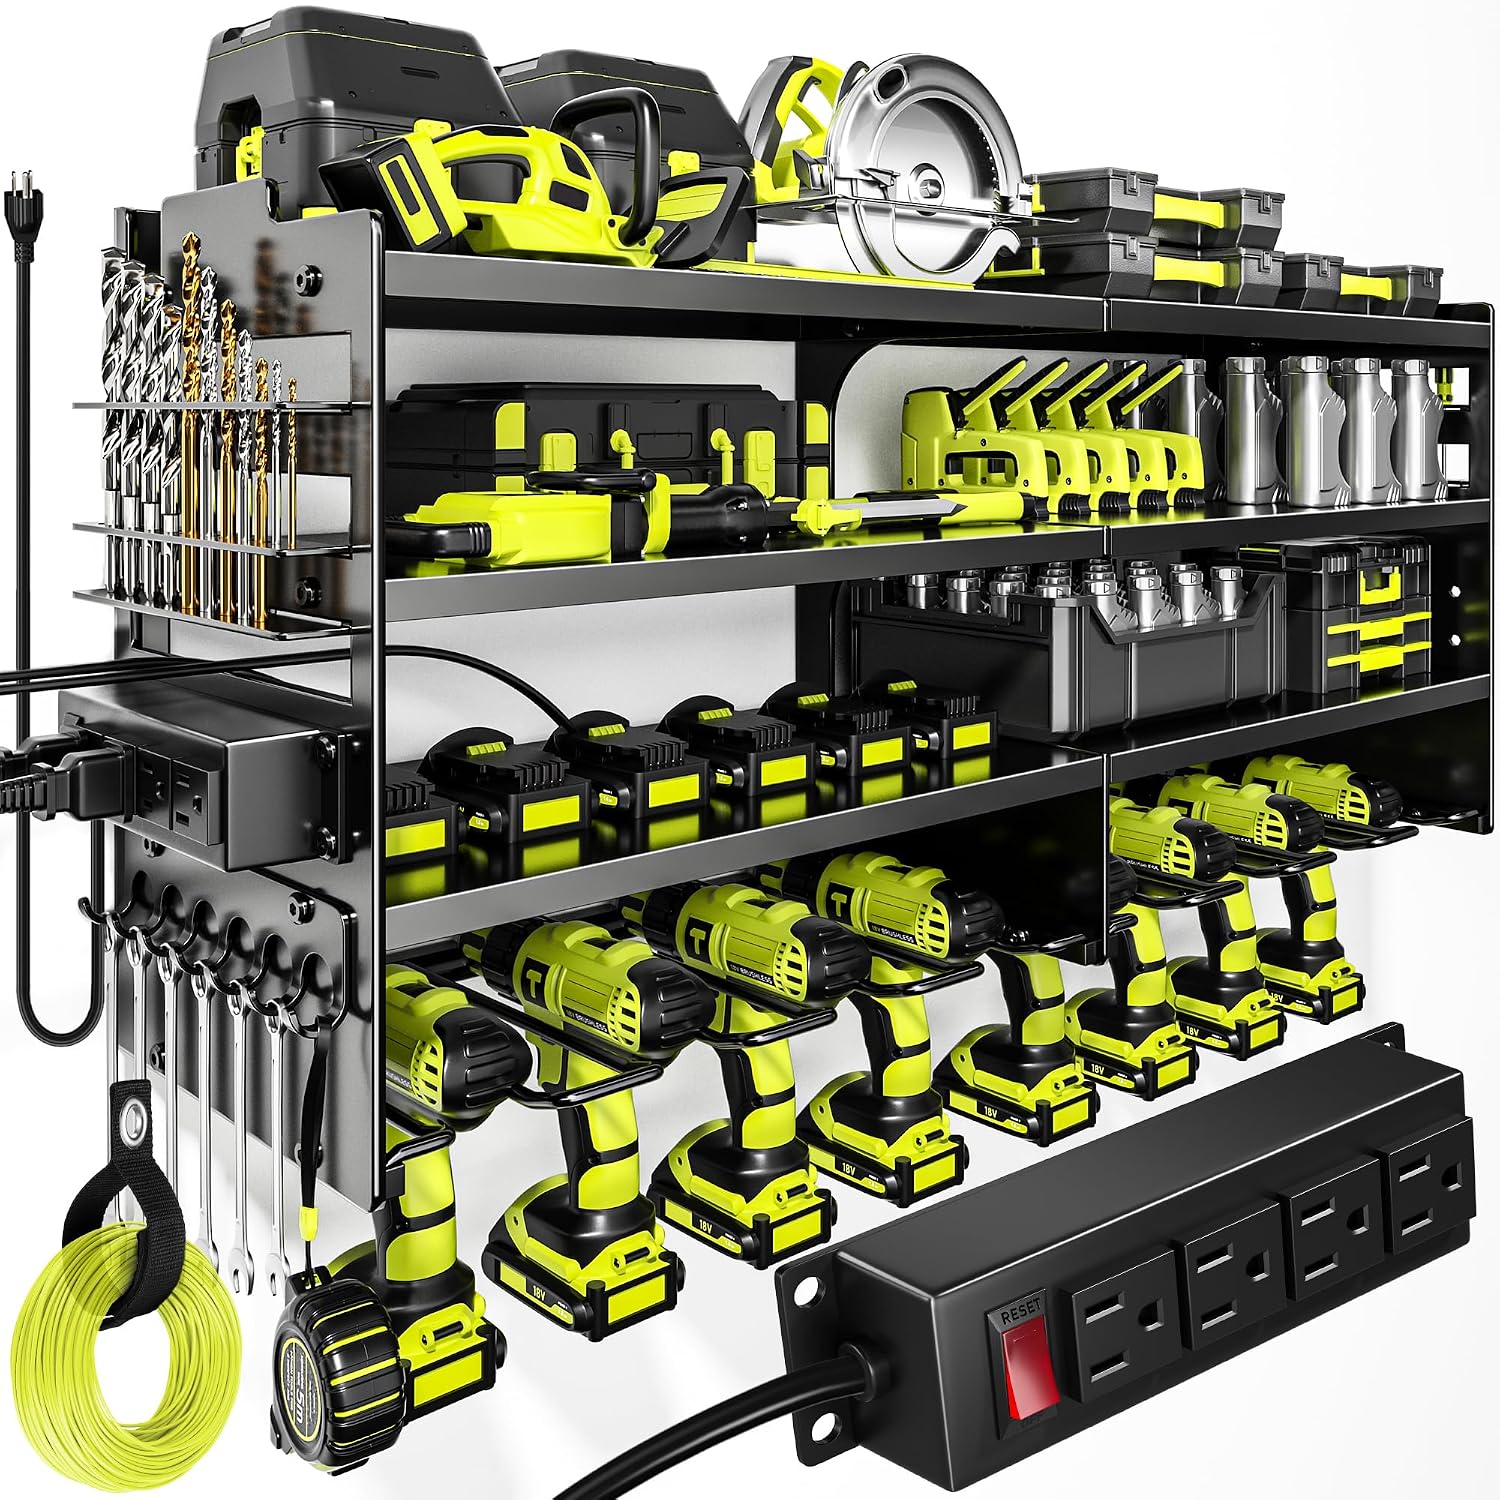
Our pick: POKIPO Large Power Tool Organizer Wall Mount with Charging Station,4 Layer Heavy Duty Metal Tool Storage Rack Loads 600lbs with 8 Cordless Drill Holder,Battery Utility Rack Loads with 4 Power Strip
 Visit on Amazon →
This is the one I would hang first in a working shop, because it solves the two problems at once. The listing describes four layers of steel, eight cordless drill holders, and a built-in four-outlet power strip. That last part is the reason it wins. If your chargers live on the same rack as your drills, you stop unplugging one tool to plug in another, and you stop running an extension cord across the floor where you will trip on it while carrying a socket set.
The manufacturer lists a 600 pound load rating, and I will say the same thing about that number that I say about every load rating: it is a claim about the steel, not a promise about your wall. Spread the load across two or three studs with lag bolts and you will never think about it again. Hang it on drywall anchors and no rating on the box will save you.
The eight drill holders are the other practical win. Eight cordless tools, each in its own cradle, means the drill you need is the one you see, not the one buried in a drawer. For anyone running a mix of drill, impact driver, and a couple of older 18V bodies, that is the layout that keeps a bench clear.
Flaws but not dealbreakers: A power strip mounted on a rack is convenient, and it is also one more cord you have to route with some thought. Plan the circuit before you plug in four chargers, and do not daisy chain a second strip off the first.
Anyone with a wall of cordless tools and a charger pile on the floor should start here.
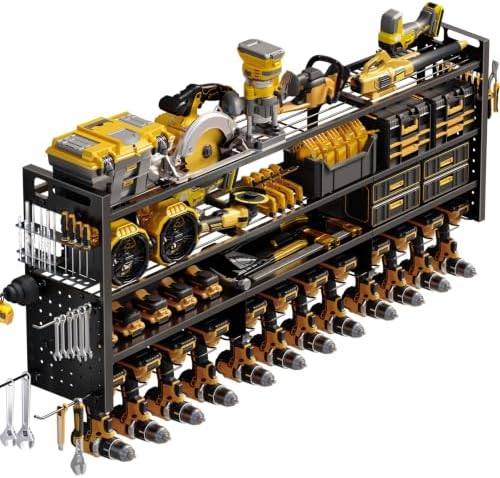
Upgrade pick: Large 49'' Wide Power Tool Organizer Wall Mount, 4-Tier
 Visit on Amazon →
This is the rack for a long, empty wall run. At 49 inches wide, it spans three studs on standard 16-inch centers if you position it right, which spreads the load wider than a narrow unit ever can. Four tiers give you room for drills on one level, batteries on another, and hand tools or a charger shelf on the rest.
There is no built-in power strip here, so factor in a separate strip and a place to mount it. That is not a knock. It just means this one is for the person who wants maximum shelf area and does not mind running power to it separately.
The width cuts both ways. On a clean garage wall, it swallows a whole category of clutter in one shot and looks deliberate. In a tight bay where the wall is broken up by a door track or a hose reel, that same 49 inches can be hard to place. Measure your wall before you order, not after.
Flaws but not dealbreakers: A wide rack needs a wide, flat wall section, and the outer ends have no stud behind them unless you add a backer. If the spacing does not line up, a piece of 3/4 inch plywood bolted across the studs solves it and gives you something solid to drive into anywhere along the run.
Anyone with a long garage wall and more tools than shelves will get the most out of this one.
Tools and hardware you need before you drill
Gather this before you touch the wall, because the trip to the hardware store in the middle of a mount job is what turns a 45 minute job into a two day job.
- Stud finder, plus a thin nail or a strong magnet to confirm what it tells you
- 4-foot level, because a rack that looks level from the floor is usually not
- Tape measure and a pencil
- Cordless drill and an impact driver
- 1/4 inch lag bolts or structural screws, 3 inches long, with washers
- A 3/4 inch plywood backer if your studs do not line up with the bracket holes
- Wire staples or cord clips for the charger cords
- A GFCI outlet or a quality power strip for the charging station
How to mount a wall mount power tool organizer, step by step
Step one: pick the wall and clear the zone. Choose the wall you face while you work, not the one behind the car door. Clear the area and check for anything running through the wall: wiring, plumbing, a hose bib. If you are drilling near an outlet, assume there is a cable running horizontally or vertically from it and stay clear.
Step two: find the studs. Mark each stud center with a pencil line, top to bottom, in the area the rack will cover. Confirm the stud finder with a thin finish nail if you are not sure. Two studs is the minimum for any loaded rack.
Step three: set the height. Hold the rack against the wall and mark the top of the bracket. Keep the lowest tier at least 18 inches above the bench or floor so long tools hang clear. Keep the top tier within easy reach with both feet flat on the floor. The best rack in the world fails if you need a step stool to put a drill away.
Step four: dry fit and mark the holes. Have someone hold the rack or clamp it in place. Mark every mounting hole directly on the wall, not on the bracket, and check that at least two holes land on stud centers.
Step five: decide on a backer. If the bracket holes fall between studs, cut a piece of 3/4 inch plywood to span at least two studs, bolt the plywood to the studs with lag bolts, then fasten the rack to the plywood. This is the fix for nearly every awkward wall, and it also lets you slide the rack left or right until the layout feels right.
Step six: drill pilot holes. Use a bit slightly smaller than the shank of your lag bolts. Too small and you will snap a bolt head off. Too large and the threads will not bite. Drill into the stud center, not the edge.
Step seven: bolt it up. Drive lag bolts with washers into the studs. Snug them down, then check level with the 4-foot level before final tightening. Tighten in a cross pattern so the bracket does not pull crooked.
Step eight: load it bottom first. Heavy tools on the lowest tier, light stuff up top. Batteries on a shelf with a lip, drills in cradles with the chuck pointed down or sideways, never hanging on the trigger. Put the tools you use every day at chest height. Put the ones you use twice a year on the top tier.
Step nine: chargers and cords last. Mount the strip, plug in the chargers, and route every cord through clips or staples so nothing dangles where a drill body can snag it. Leave a small drip loop where each cord meets the strip.
Charging station wiring that will not burn your shop down
A rack with a built-in power strip is convenient, and convenience is exactly why people overload it. Four chargers running at once is normal and fine. Four chargers plus a shop vac plus a bench grinder on the same 15 amp circuit is how you find out where your breaker panel is in the dark.
Keep one strip per rack, plug it into a GFCI protected outlet, and do not chain strips together. Route cords behind the rack where they cannot chafe against a metal edge, and give the chargers air. Batteries get warm while they charge, and stacking them tight against a wall traps that heat.
If you are running new power to the wall, do it before you mount the rack. Fishing wire behind a bolted up steel rack is a job nobody enjoys.
Mistakes I keep seeing in other people's garages
Mounting too high is the number one error. People hang the rack at eye level for the photos, then find out that the bottom tier is the only one they use.
Loading top heavy is number two. All the drills and batteries go on the top shelf because that is where they fit, and the rack pulls away from the wall at the top corner within a year.
Hanging on drywall anchors is number three, and it is the one that costs you a drill. Anchors and toggle bolts are for pictures and towel bars. A loaded tool rack goes into studs.
The last one is treating the rack as general storage. Paint cans, a bag of concrete, a coil of chain. That is how a tool organizer becomes a shelf that sags, and how you end up back at step one with a wall full of holes.
What this all costs
Both organizers here sit in the same bracket, in the range of a decent hand tool, and the hardware is the cheap part. A box of lag bolts and washers runs a few dollars. A plywood backer runs a few more. The whole job is an afternoon if you already own a drill and a level, which you do, because that is why you are reading this.
Compare that to the alternative: a bench that is never clear, batteries that never get charged because the chargers are buried, and the same three tools migrating around the garage forever. A wall mount power tool organizer is the cheapest square footage in the shop, because it is square footage you already own and are not using.
Do it once. Measure twice, hit the studs, load it bottom first, and let the wall do the work.